Showing posts with label textile art. Show all posts

Thursday, February 11, 2021

Nurture - Hope - Peace - Joy - Understanding


 On a background of eco-printed cotton, I have screen printed an image of trees on the earth. Surrounding that image are lines that are drawn in ink, paint and thread . . . holding it all in with freehand thread painting of the words HOPE ... UNDERSTANDING ... COMFORT ... PEACE ... JOY ... NURTURE.

Nature needs our nurturing and understanding and in return we are provided comfort, peace and joy. This small art quilt (approximately 9" x 12") is backed with white wool fabric and it has been hand stitched around some of the prominent leaf prints and seed stitched over the majority of the background.  A hanging sleeve allows it to hang from a dowel or a branch.

Monday, March 26, 2018

Eco print, Indigo and Rust

What a combination of natural processes have gone into this new art quilt.  The cotton fabric was eco printed with leaves from my garden ... then the long edges of the fabric were dipped into the indigo vat to give just a hint of pale blue ... then I rusted it on an old iron trellis found in my yard.

I wanted to have a take-long piece to work on when travelling.  I find that hand stitching passes the time when flying (and eases my anxiety as well!) so I chose a piece that will have LOTS of handwork on it.  I sandwiched this piece of fabric with cotton batting and backing and then machine free-motion quilted around the rusty elements and down the indigo-dipped edges before applying an invisible binding. The result is pretty wonderful already, but I have lots of hand stitching to do on this piece as well as some applique, so check back to see how it progresses . . . and to see a full view.
The finished size is approximately 14" x 52"

Friday, March 16, 2018

It's Finished - Hoodoos!

I just couldn't stop!  This art quilt consumed me so much that I just HAD to keep going on it and it is now finished.


All hand dyed and hand painted fabrics. The sky fabric is shibori indigo dyed and has been written on in block and script lettering "hoodoos".


Size 13" x 23"


 The sky is quilted on the diagonal with the word "hoodoos" in variegated blue thread.


Hand stitching accentuates the texture of the hills.


There are more photos in the listing of this piece in my Etsy shop (kathykinsella.etsy.com)

Wednesday, March 14, 2018

Hiking in the Hoodoos

My hairdresser's hike in the hoodoos, just west of Kamloops last weekend inspired this art quilt that is just in its infancy.  All hand dyed or hand painted fabrics with the sky fabric also being formed from a patchwork of fabrics on which I wrote the word HOODOOS in block and script styles.

Thanks to Rebecca for permission to use her awesome photograph as a starting point for this piece.

I will post more about it as it continues . . .

Wednesday, March 9, 2016

Rusted Fish

I have been pondering the idea of creating a rusted fish art quilt for some time and I leapt into it last night after removing everything from my living room fireplace in preparation for painting the brick.

The fish is one that I picked up at a market in Campbell River, BC, some years ago. It has been cut from rusty corrugated iron and it really appeals to me.


What I did was place the rusty fish on a piece of plastic then place the cotton fabric (already dampened with diluted vinegar) loosely on top. I made sure the fabric was making contact with the fish and then covered it with plastic to keep it damp and left it.  I thought it would take a week or two to get the image but today I discovered it was already very rusted  so I am now drying the fabric (while I make another imprint on the other end of the cotton) in preparation for the next step . . . and I'm not yet sure what that will be.  I'll let you know later!

PS ... I hope to remember to stay on-track with the fireplace painting, too!

Wednesday, June 17, 2015

Prayer Flags for "Learning"

I was asked to make prayer flags that will be given as gifts to speakers, musicians, course leaders and others at Sorrento Centre this summer and now that they have been delivered, I would like you to have a peek at them.
They were created by using hand-dyed fabric (blue) that I tore into the appropriate size strips and then dipped the bottom edge in bleach to discharge the colour ... then I painted that edge with golden and greenish textile paints to create meadows and hills.  I then screen-printed a tree on each flag and followed that with hand embroidery of a few flowers before adding the hand-lettered "learning" patch. The top edge was turned over and hand stitched to hold a twig of red dogwood that I gathered at Sorrento Centre this spring.  These are single-sided flags and all the edges are left ragged so that if they are left outside in the weather they will fade and fray away, but they will maintain their colour if kept inside, out of direct sunlight.

They were a delight to make and I love that we chose the word learning for these flags,  from their motto, Sorrento Centre: A holy place of transformation for learning, healing and belonging.

Sunday, January 25, 2015

Wildflower Meadows in Felt and Stitch

Wildflowers are a favourite theme for me when I am needle felting. The felting seems to lend itself to gentle landscapes and adding hand stitched flowers and foliage seems to make them come alive.

This is the first time that I have stitched the felted landscape to a fabric background and then continued the stitching into that background.

The piece was then wrapped and stapled to a stretched canvas for hanging.


Sunday, December 28, 2014

Just for Me

This one's for me! 

You might have already guessed that I have a bit of a thing for spawning sockeye salmon ... I have worked on this theme from time to time over the past five years and never seem to tire of it. This art quilt has been created using hand dyed fabric by Judy Robertson. I love the vibrant red-purple pieces that I used for the salmon ... and the background piece made a gorgeous non-traditional watery setting. This is an art quilt that I started in a workshop with Catherine Nicholls over a year ago and Catherine really challenged me in the design and the four light sources on the rocks (and helped out when I couldn't see where those shadows should go!).  I'm not sure that I really got it right, but I loved the effect, once it was all quilted with watery blue variegated thread.

This measures approximately 30" square and is hanging over the fireplace in our living room.

Wednesday, April 23, 2014

Blessings Prayer Flag

Blessings . . . this prayer flag has many blessings flapping from the lower edge of the flag. It has been created from some of my hand dyed and monoprinted fabrics and was destined to be an example for my upcoming prayer flag workshop but . . .
I  have a friend battling a brain tumour and I felt that this was the week he needed to have this prayer flag so it has already headed off to Vancouver.

This is a very free-spirited flag ... you can see that it is not "square" and there is an asymmetrical and casual balance to the flag, which is how I see life taking us sometimes. The soft purple fabric is a more densely woven cotton than the fabric with the blue and purple monoprint on it, which provides a soft contrast in texture. This is a single thickness of fabric so if it is left outside (or handled a lot) the edges of the fabric will fray and soften with time.

The narrow strips of purple cotton have been printed with many of the blessings I wish for my friend at this time. There is a knot at the end of each blessing and they are attached by a purple bead to the main part of the flag.

One of the techniques we will experiment with in my workshop at Sorrento Centre starting this weekend, is monoprinting ... I'm sure that the participants will feel like they are back in pre-school as we play with paints on gelatin plates and transfer the designs to fabric ... fun! There is still space if you want to join us so just call Sorrento Centre and come along!


Tuesday, February 4, 2014

Needle Felted Book Cover

Needle felting is so much fun and it creates rather ethereal looks  . . .  just what I love!

I have been working on a book cover that will protect a Bible. The person for whom the book cover is a gift was very taken with my felted flower gardens and asked if I could create one for her Bible. We talked about some of the things that would make this particularly special for her and this is the beginning of the piece . . .
Needle felting distorts the shape of the base during the felting process, so there is always extra felt that will be trimmed back from the edges before the piece is finished.  I have chosen a couple of pieces of my hand dyed and hand painted fabric (in the top corner of this photo) that I will use for the lining and the binding.

I first needle felted the wool rovings that I chose for the sky and field to the base fabric and then started adding the background flowers before moving to the foreground and creating larger, more detailed flowers. I also felted some hand dyed cheesecloth into the foreground to give some added texture.

After all the felting was done, I used some free-motion machine stitching to create flowing lines in the sky and to accentuate some of the flower shapes as well as grasses and leaves. This helps strengthen the felted piece as well as adding details.

The final step was to add some hand embroidery stitches ... some bright yellow dandelions, delightful red strawberries, and even a couple of butterflies and one little ant :)  I added a piece of lightweight fusible interfacing to the back of the felt in order to stabilize it before constructing the cover. Having the fusible interfacing on the back would help keep the embroidery stitches in place if I happened to snip one when I was squaring up the felted piece.

The cover is finished now and you can see in the detail photo above, the way that I bound the edges before hand stitching the cover right onto the Bible. I wanted the cover to fit very tight and this one was just perfect :)

I added some page markers with pretty glass beads in the shape of leaves. My label is sewn into the inside of the binding so it is not visible when the book is opened.


Thursday, January 2, 2014

Prayer Flags ... Inspiration Flags

I have been having such fun creating a small set of prayer flags as a class sample for my upcoming workshop at Sorrento Centre!  I just know that it will be an enjoyable class for the participants as they work on a theme that suits them using techniques that I will teach during the workshop.

This is a set of three contemporary prayer flags that are double sided, but have no batting between the layers. Some of the stitching has gone through both layers, but each side is unique.  I will show you the second side of this set next week, but for now I'd like to share side one of the three flags. They are approximately seven inches square.

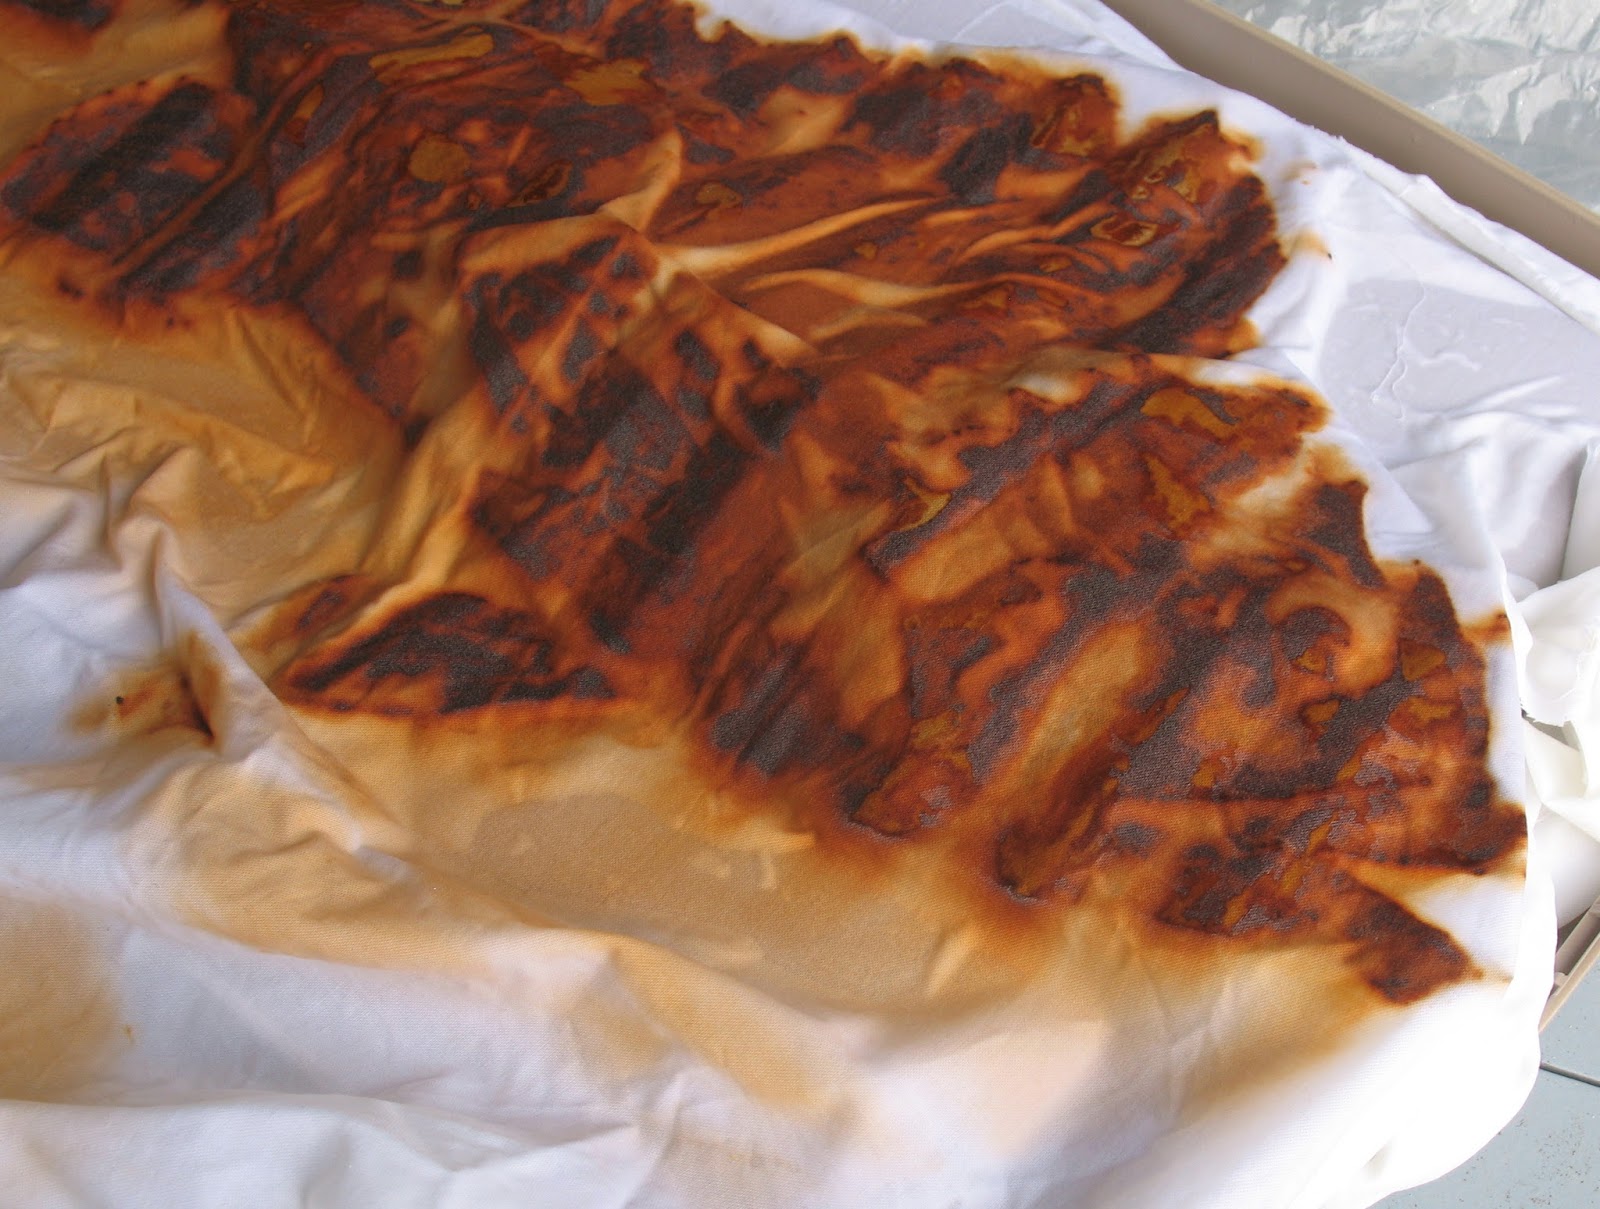
These flags have been created on a piece of my hand-painted fabric that has been awaiting inspiration for a couple of years.  I wish I had taken a photo of the piece of fabric before I tore it up, but you will notice the variations in colour throughout the flags, including little bits of white showing where I had not painted the entire piece of fabric. 

The hues of watermelon and chartreuse have been continued in the threads I chose for the stitching as I really wanted these to be peaceful and harmonious flags.

I chose "hope" for the first flag and the images of hearts.


The next flag will hang as the centre of the three and I chose "peace" for the theme and included a peace symbol that I created in pointillist style.

The tiny buttons (about 1/4" in size)  that cascade down the flag are symbols of something that holds us all together.


The third flag is "believe" and it is represented by a screen-printed tree that is anchored in the earthy part of the flag.

A sprinkling of seed stitches in a variegated thread drift across the flag and in the lower left corner there are three little patches with beads and hand embroidery.


Here is the link to the workshop where I will be teaching inspirational flags and buntings at Sorrento Centre

Monday, December 30, 2013

Welcome Bunting

I have been working on samples for new workshops I will be teaching in 2014 and I am having a really good time with those I am creating for Quilt Week at Sorrento Centre.  My workshop this year is called "Creating Inspirational Flags and Buntings" and it will be five days of playing with surface design techniques with the objective of creating some flags and buntings.

I will be showing you some of the contemporary prayer flags I am creating in a future post, but for now I would like to show you the bunting I made which incorporates a few of the surface design techniques we will be using.


Each of the little flags in the bunting is quilted and the backing fabric is a holly leaves print, so it could be reversed and used as a Christmas bunting, too. Some flags are appliqued, some are painted, there is couching, beading, hand stitching, and painting after quilting, too. Click on the image below to see more details.

If you would like to know more about Sorrento Centre's Quilt Week, there are three concurrent workshops offered, two of which are more traditional quilting courses so your not-quite-ready-for-art-quilting friends can join you for a week of stitching fun. Here is the link to my workshop http://www.sorrento-centre.bc.ca/2014/2014-0425a-kinsella.html

I'll be back in the New Year with some of the inspirational flags that I am creating on my hand-painted fabric.

Monday, September 30, 2013

Silk Fusion Wall Hanging - Whispers From the Deep


I started this silk fusion piece in July so that I would have a "work in progress" to work on while I was volunteering at the Festival of the Arts . . . and I immediately realized that it was going to be one of my favourites! It has been on my design wall and I have worked on it occasionally in between other projects and I have thoroughly enjoyed every stitch that has gone into it.  Let me tell you a bit about it . . .


I created the silk fusion using silk hankies and throwsters silk in shades of smokey blue and lavender through magenta.  The piece was formed into a softly curved crescent with lots of feathery edges as well as added texture in the interior of the piece.

After it was dry, the silk fusion was then free motion stitched to a background of royal purple dupioni silk and the background was further enhanced with free motion quilting. I left two areas without the dense machine quilting and later added seed stitches by hand, stitching only into the batting and not all the way through to the backing, so those areas are a bit puffy. I added layered hand embroidery on top of the silk fusion before stitching the gorgeous silk carrier rod in place and then funneling beads into the top and out of the bottom end of the rod.

This is a wall hanging that measures 9.5" x 24.5" (24 x 62 cm) and can be hung by a concealed dowel through the sleeve on the back. The backing is a beautiful batik that has the same colours as the top. It will eventually be for sale through my Etsy shop, but for now I would like to hang onto it and enter it in a couple of shows.


The dyed silk that I used in this silk fusion is some that I purchased through the Etsy seller, Nunoco, in England. The silk carrier rod that is stitched to the surface was the inspiration for the piece.

Thursday, September 12, 2013

Fibre Art Journal #2

Here are the photos of the fibre art journal that I showed you pictures of when it was in progress a few weeks ago.  I have had most of the finishing touches done for some time but, you know, there is always something else that I can add . . . this is a project where you can keep adding finishing touches because it is an item that will be viewed up close for the details that you have created!

This particular fibre art journal showcases techniques that I will teach in an upcoming workshop and I think that the participants will have a great time deciding which of their favourite techniques to include in their journal. If you click on the images, you can zoom in for a closer look.


The accordion journal is double sided so, at this size, there are ten spaces to be filled.
Here is the second side . . .


For this journal I chose to use a black cotton background fabric and my samples are primarily in the green and gold colourway, with little accents of purple.

Some of the techniques include several edge finishes, altered cloth, hand beading, funky hand embroidery, covered sticks and cords, thread painted leaves and organza leaves, fibre art beads, couching threads and cords, hand stamped fabric ... and, of course, I had to include some of the samples on my hand painted and hand dyed fabric.


Tuesday, June 18, 2013

Fluttering By

 My butterflies art quilt had its first showing at the Salmon Arm Quilt Show earlier this month and it received lots of oohs and aaahs when visitors took the time for a close look at it.  It measures approximately 20" x 34" and I blogged the process in March if you would like to scroll down to find that post. I am pleased with the way that it has turned out and I'm sure that I will enjoy continuing the butterfly theme into future work.

Here is a detail shot of one of the butterflies. I created the butterflies separately and then machine appliqued them to the quilt before adding hand stitches. The bodies of the butterflies are wet-felted wool. If you click on the photos you can zoom in for a closer look.

This art quilt has been entered in the Shuswap Lake Festival of the Arts show in July.
UPDATE: This piece was awarded "Jurors' Choice Award" at the SLFA July 2013.

Friday, January 18, 2013

Northern Lights Art Quilt


Sometimes an image lodges in my mind and I can't let go of it . . . that is the way it has been with the thoughts of this art quilt depicting the Northern Lights.  Since "the kids" moved to the Yukon a couple of years ago I have become enraptured by the history and the landscape of that beautiful part of the world.

The northern lights can be many colours and shapes . . . they might greens and yellows that swirl and dance, or pinks and purples that envelop the sky, or any combination. I wanted to portray their ethereal quality using soft wisps of wool roving needle felted into a dark sky . . . and so this art quilt was born.

The sky was needle felted onto a base of two layers of black quilt batting that were first felted with midnight blue roving with a touch of violet added to it and then the northern lights were added with wisps of light greens, yellow and a touch of blue, some of which have a bit of gloss to the wool.

The tree line and lower section of the quilt were created using hand dyed fabric that I over-painted with a wash of black and green textile paint to further subdue it. That fabric was backed with fusible web and then I freehand cut the tree line.

The northern lights were free motion stitched in sweeping curves, using invisible thread and the lower section was quilted in a free motion design somewhat representative of a forest.

This art quilt measures 13" x 22.5" (33 x 57 cm) and is backed with black cotton with a hanging sleeve.

I can see that this will be only the first of a series of quilts with a northern lights theme ... in fact, I might have to go and start the next one right now . . .

Wednesday, November 21, 2012

Felted Fibre Art Cuffs

This is a busy time of year for those who sell handmade items for the Christmas market. Right now, I am in between two artisans show/sales in which I am participating this year . . . and I'd like to tell you about one of the items that I have created for these sales.  Cuff bracelets have been appearing in a variety of fibres and techniques over the past couple of years and I started selling some of them in my Etsy shop this year. They have been fun to create because of the incredible scope of embellishment.


I make cuffs in many techniques, but the cuffs pictured in this post are needle felted . . . dyed wool roving, threads, spun yarn and even bits of silk have been needle felted onto a base of either felted wool or synthetic wool and then they have been accented with hand embroidery stitches and a bit of beading before adding the handmade button closures. These buttons are from another Etsy seller, 2goodclaymates who also happens to live in the Shuswap area.  Carolyn custom matched the colours in some of the cuffs to come up with the buttons ... and others I found in her "ready made" collection.


The cuff on the left in the photo above has the added flourish of a burned organza ruffle around the edges which makes it so spectacular on your arm.

These cuffs are some that I created this week after selling so many of my cuffs at the sale last weekend, that I had to replenish my stock. If they don't sell this weekend, they will later be listed in my Etsy shop.

If you live in the Okanagan . . . do drop in at the Okanagan Artisans Show and Sale at the Best Western Vernon Lodge (in Vernon) this Friday, November 23 (noon to 9pm) and Saturday (9:30-3:30).  I will be there along with my felting friend, Gwen Martinuk who will be selling her gorgeous felted scarves and accessories as well as delightful felted birdhouses ... you'll fall in love with them as soon as you see them! 


Wednesday, June 27, 2012

Sorrento is 100 Years Old

I live near the village of Sorrento which is located about half way between Vancouver and Calgary on the Trans Canada Highway.  This year Sorrento is celebrating it's 100th Anniversary and there are lots of celebrations taking place throughout the year.

The Shuswap Lake Festival of the Arts is an art show and sale that takes place in the village every July.  This year I wanted to create something that would speak to the 100th anniversary, and I decided on an art quilt that would represent a bit of the landscape of the area and have some words that would celebrate 100 years.

I was originally going to do a topographical map of the area but started sketching a slightly aerial view looking down the lake and my hubby was so taken with the sketch that he convinced me I should try this image in fabric.  In this image, Sorrento is located in the foreground of the piece (I chose not to include any buildings or highways ... only the land and the lake which have remained the same for 100 years) and looking further east down the lake you can see Copper Island in the middle and the mouth of Blind Bay on the right side (since it really is a blind bay, you can't see that opening when you are just looking east at lake level ... but I wanted to have it more noticeable since that's where I live!).

The dates, 1912 - 2012 and the name, Sorrento BC, have been stencilled onto the asymmetrical borders using Shiva Paintstiks in two colours to give the letters a bit of character. The texture that has been quilted over the landscape portion has been achieved by writing a little story about Sorrento in free motion quilting.  It is my first attempt at writing free motion so I am sure that future art quilts will show some improvement but I am very pleased with the effect that it creates.  Both the stencilling and the quilted writing were something that was covered in a course I took this spring with Catherine Nicholls ... it was a great workshop and I came away with numerous things that I would like to experiment with.

The heart that is quilted into the top left corner of the quilt is there because Sorrento is known as
"The Heart of the Shuswap".


Friday, June 22, 2012

Tree of Life - the finale

It's been a long time since my last blog post so . . . . as I said at that time, this tree of life landscape was commissioned to be used as a book cover so there were some design factors that had to be considered for it to be functional as well as an inspiring piece of art.  After a consultation, we decided to eliminate the roots of the tree and bring in more of the spring garden aspect of the landscape.

I re-worked the lower section of the landscape with a cheery hand dyed green fabric and then added flowers in the garden with hand embroidery.  It is a representation of the memorial garden at Sorrento Centre.


The book cover was then cut down the spine and I inserted another piece of hand dyed fabric that I printed with the name of the centre.  There is a pocket in the front flap to hold pamphlets or papers and it has been tightly fit to the scrapbook sized binder.

Tuesday, January 3, 2012

Daisy a Day


This is a little art quilt that I created as a sample for a class I will be teaching at Pleasant Valley Quilt Shop in Armstrong, BC in April. The main focus of the class will be creating a piece of unique fabric from bits and pieces of fabric, thread, glittery bits and organza and then the participants will use that piece of unique fabric to embellish an art quilt, a purse or a greeting card. It is such a fun "play day" and I thought you might like to see how I translated it into an art quilt.

The centres of the flowers are heavily beaded with additional bead dangles and the dragonfly is adorned with a few tiny seed beads and black sequins for his big eyes ... the wings have been made from Angelina that has been stitched with silver thread.

The grasses blowing in the breeze have been created from organza that has been stitched and then the edges have been left to fray in order to create more wisps.

The stem of the plant has been created by layering two decorative ribbons and yarn and then free motion stitching to give even more texture. The leaves on the plant are made from another piece of unique fabric that I created in green tones.

The background has been stitched in midnight blue thread. The outer edge of the art quilt has been couched with shiny black cord.

This art quilt measures approximately 12" x 20"