Tuesday, August 9, 2016

Eco Prints and More at Artistry - August 13th

Artistry
Saturday, August 13th
10am to 6pm
Blind Bay Hall
on Blind Bay Road in Blind Bay, BC
 
This Saturday I will be setting up shop at "Artistry" in Blind Bay.  This is a one-day show and sale by local artisans where you will find a variety of handmade goods and the artists who create them.  I have been busy making some new scarves as they are selling like the proverbial hotcakes this summer!  Here are a few of the silk scarves that I have been making this week. A few more silk-wool blend scarves are ready to be un-bundled tomorrow ... one of my favourite things to do!


Isn't this an awesome peony leaf

One end of this long scarf is dark, the other end is light

Monday, June 13, 2016

I've been published in Art Quilting Studio

Silk fusion is one of my favourite techniques to work with and in the Summer 2016 edition of Art Quilting Studios there is a three-page article on one of my pieces.  This is silk fibre that was dyed using kool-aid and then stitched to a background of black dupioni silk.


Sunday, May 22, 2016

Eco Print T-Shirt Part III

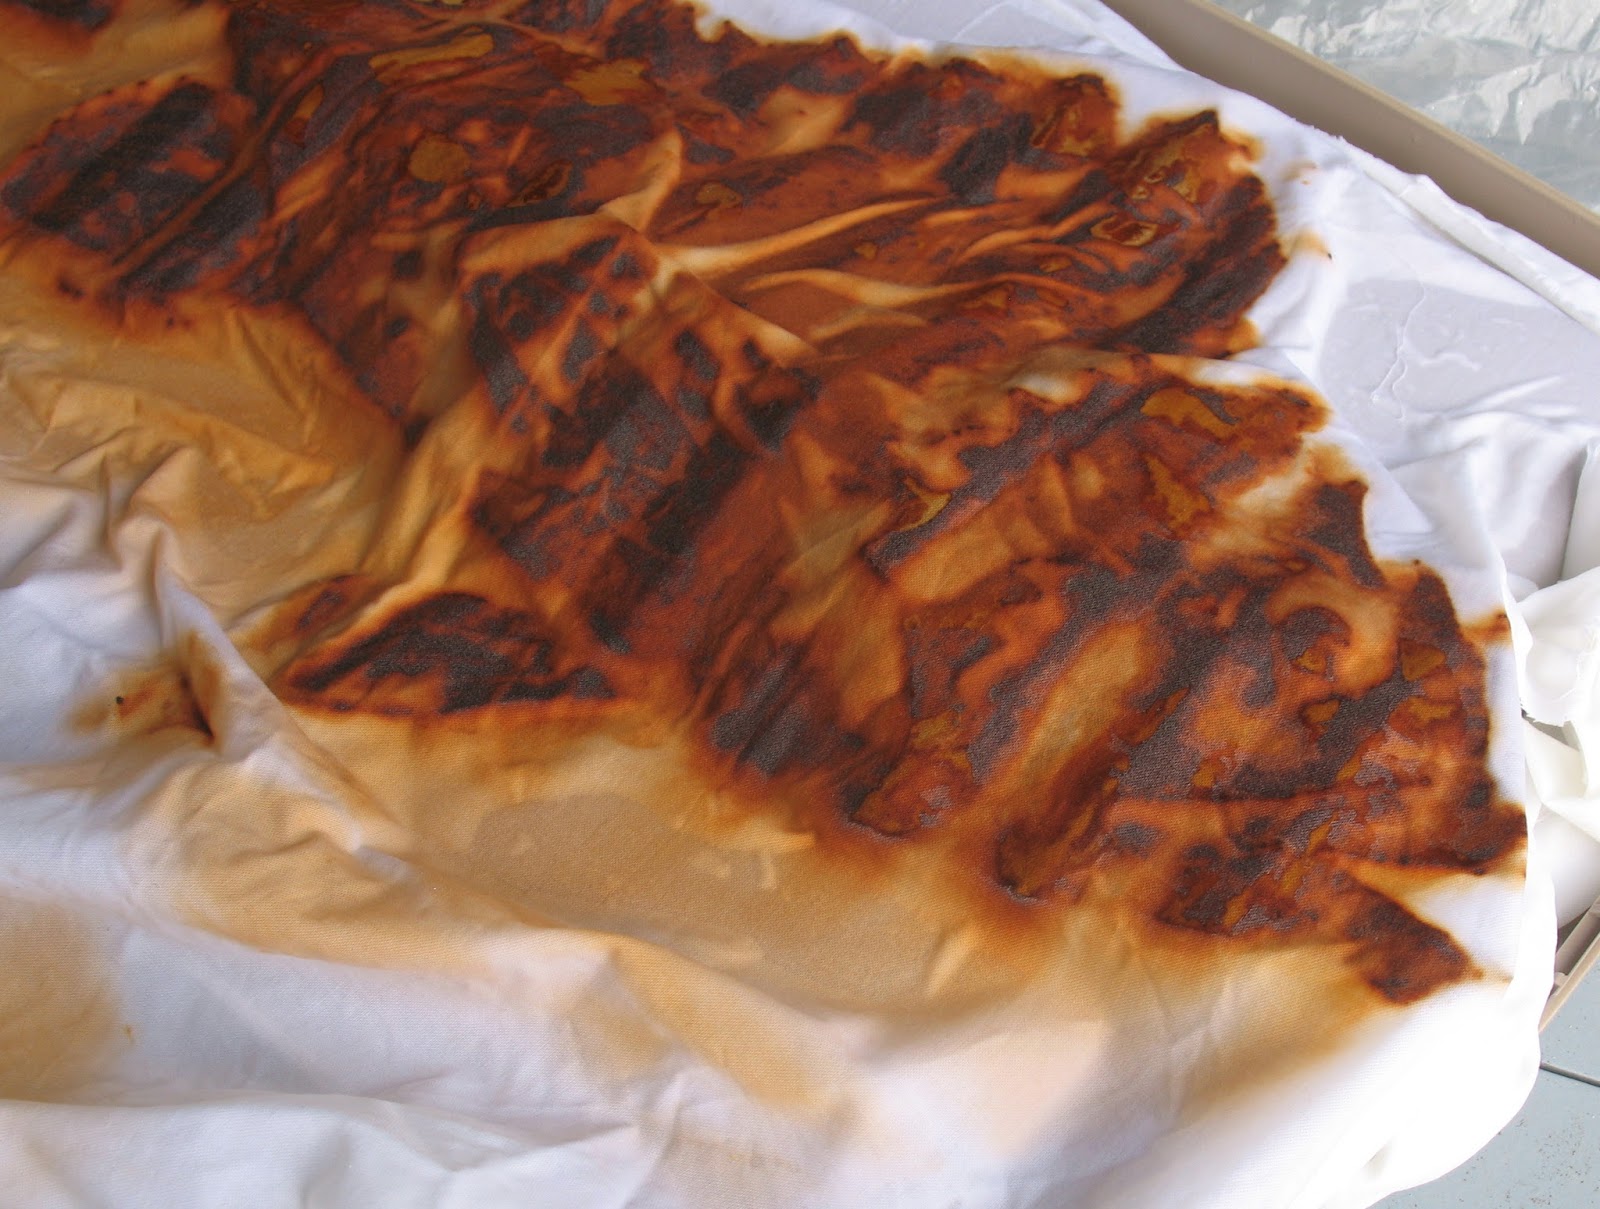
The t-shirt has dried and been ironed and now it is time to leave it a little while longer before rinsing it for its final reveal ... but in the meantime, here are photos of the t-shirt
I am very pleased with the imprints achieved from the raspberry leaves and the purple Japanese maple. The smoke bush leaves were not as defined as usual, but they do add more to the overall imprint of the piece.


The background is a soft gold that will probably wash out a bit but I am delighted with this, my first attempt at eco printing on a finished garment.

Friday, May 20, 2016

Eco Print T-shirt - Part II

Continuing on with the eco print t-shirt story . . .

The bundle rested for four days after being simmered, until I couldn't stand the suspense any longer and I opened the bundle.

The following photos show the bundle as I was unwrapping it ... first with both imprints and leaves showing and then with the leaves and plastic removed.

I am really pleased with how this has turned out and I will post a photo of the full shirt once it has dried.


Thursday, May 19, 2016

Eco Print T-shirt - Part I

I have been interested in trying to eco print on a finished garment . . . I see this as a challenge because of the finished seams and construction details (sleeves!) but also as a way of achieving a design on a specific part of the garment.

I purchased a plain inexpensive cotton t-shirt for this first attempt and I scoured it to remove impurities from the manufacturing process and then pre-mordanted it with alum and soda ash.

I chose leaves from which I could be sure of getting some imprint (raspberry, rose, Japanese maple and smoke bush) but I also added some unknown grasses along the lower edge.
In between the front and back of the shirt I inserted fabric that had been soaked in an iron-rich solution.

The shirt was rolled between layers of plastic onto a thick wooden branch and the outer edge was covered with plastic before being wrapped tightly. I then simmered the bundle in water with iron and onion skins for two hours.

Tuesday, May 10, 2016

For the Birds


As people who work with fabric, we always have bits of thread and fabric hanging from our clothes and clinging to the furniture and carpets in our homes ... so I decided to take some of those bits and pieces and offer them to the birds!

This is the suet feeder that has kept our winter visitors well-fed during the colder months and it is usually put it away once the bears are roaming in the spring. This year I have filled it with thread waste and a few small trimmings from hand dyed fabric in hopes that some of the birds will use the bits for nest building.

I'll let you know if. Can get pictures of any of them taking say samples.

Saturday, April 2, 2016

Flour Paste Resist - Day Three

Today we will see the final results of the flour resist painting technique . . . it is an exciting time as you remove the resist and see what changes have been made to the fabric.

First, soak your resist painted fabric in a bowl of warm water for about fifteen minutes. Next place a piece of the fabric on a plastic-covered surface and use an old credit card or plastic scraper to gently scrape the gooey gunk off the fabric.  Work slowly and enjoy revealing the new design on your fabric.

NOTE: Do not put the flour goo and water down your drains ... place it in the compost or garbage and throw the water onto the garden.

Once you have scraped off all of the flour paste resist, rinse the fabric lightly in warm water (remember the paint has not yet been heat set) and leave it to dry. Heat set the paint according to the instructions on the paint (for this paint I pressed the fabric between layers of parchment paper for the required time). The fabric can now be laundered to remove any residual flour and then it will be ready for you to use in your chosen project.
 
I love the veins of the black paint on the hand dyed fabric and the commercial batik.

The metallic yellow made gorgeous veins on the dark cobalt commercial fabric but I can see from the sample done on the purple dotted fabric that I would have liked more crackling on that piece ... that means I should have crumpled it a bit more or applied more paint to the surface. This technique is a bit more predictable than some, but there is always room for surprises along the way.

I hope you will try this out and add it to your fabric tool box!


Friday, April 1, 2016

Flour Paste Resist - Day Two

After the flour paste resist has dried overnight it is time to have fun scrunching the fabric!  You have control over how much crackle to have one the fabric, depending on how much you scrunch the fabric at this time. 

Lay the fabric on a plastic covered surface again and paint it with thinned textile paint.  I used Pebeo Setacolor paints in black and bright yellow for these fabrics.  I wanted a strong contrast to the colour of the fabric so I chose black to use on the turquoise hand dyed and the commercial batik and the yellow to use on the cobalt blue and purple dotted fabric.

Here are a couple of photos showing my fabric after it was painted. The edges of the fabric curled up when the flour paste resist was drying, but that didn't bother me ... I simply painted right into those curly edges.

 
Apply the paint with a broad brush ... and peek underneath to see how much is seeping through the cracks.  Be careful not to add too much paint (or have it too runny) or it might seep under the resist and you would lose the sharp crackle lines.

This photo shows the back side of the fabric with the paint seeping through.

Time to wait for this to dry before the next step!


Thursday, March 31, 2016

Flour Paste Resists

It is always fun to create new samples for workshops and this week I am working on some samples of flour resist fabrics.  This is one of the techniques that I will be teaching at Sorrento Centre later in April.

The first step is to mix up the flour and water paste and apply it to the fabric. It will need to dry for a day (maybe more, if it is humid).

I will show you the next step in a day or two . . .

Monday, March 28, 2016

Upcoming workshop ... spaces still open

I will be teaching a fun five-day workshop at Sorrento Centre in April and there is still time to sign up . . . 
Painting Fabric Painting Quilts: Exploring Textile Paints on Fabric
Quilt Week 2016 – Sorrento Centre
Friday, April 22 to Thursday, April 28

This is a relaxing workshop in which you will explore a variety of  techniques for transforming fabric with textile paints and Derwent Inktense pencils and blocks. Textile paints can transform a finished quilt or be used to create unique painted fabric.  Use techniques including sun printing, monoprinting, salt, resists, shibori designs, textile paints and Shiva Paintstiks to kick your quilts up a notch. Create a painted tablerunner. Make unique coordinating fibre art beads. Explore eco printing on fabric with leaves we gather from the garden. This will be a relaxing experimental five-day workshop to discover aspects of painted surface design with me as I delight in unlocking the artist in you! No experience needed.  Come play with us!
Studio paints and supplies will be provided for a lab fee of $25. PFD (prepared for dyeing) fabric can be purchased from me at the workshop.

Check out Sorrento Centre's website for costs, which can be tailored to your needs ... from full accommodation and meals to simply the workshop as a day student.  

Painting Fabric Painting Quilts:
Exploring Textile Paints on Fabric
with Kathy Kinsella
Textile paints can transform a finished quilt or be used to create unique painted fabric. Explore the possibilities of a variety of textile media.
Use techniques including sun printing, monoprinting, salt, resists, shibori designs, textile paints and Shiva Paintstiks to kick your quilts up a notch. Create a painted tablerunner. Make unique coordinating fibre art beads. Explore eco printing on fabric with leaves we gather from the garden.
This will be a relaxing experimental five-day workshop to discover aspects of painted surface design with Kathy who delights in unlocking the artist in you! No experience needed. Come play with us!
Studio paints and supplies will be provided for a lab fee of $25.
- See more at: http://sorrento-centre.bc.ca/2016-0422-quilt-week.html#sthash.RSs5hvhT.dpuf

Friday, March 18, 2016

Freshly painted fireplace

After mentioning in a previous post that I was going to paint our fireplace brick, I have had a few people asking if it is finished ... well, finally, it IS finished!

The original brick was that gold colour, popular in the seventies ... the colour never appealed to me but it took a lo-o-o-ong while before I could convince hubby that we could paint it.  Having had differing advice on what colour it should be, I went with my gut feeling which was to paint it the same colour as the trim in the house (Benjam Moore's Cloud White). Our great room faces north and, in spite of lots of huge windows, I wanted to lighten it up as much as I could.  Who knows if it will remain white but, for now, I love it and it provides a great backdrop for my circle of salmon art quilt! I also found a great deal on the small seagrass baskets that are nestled under the hearth ... a great place to store guitar tuners and picks as well as knitting projects or out of season mitts and hats.

Tuesday, March 15, 2016

Rusted Fish after tea-dyeing

My nice rusted fish has had a bit of a bath ... in tea ... and is now layerd and basted for quilting.

The whiteness of the fabric above the fish was just TOO white for me and dunking it briefly in tea has greyed the rusty colours a bit and has given the background a touch of lavender-grey. The lighter rusty areas around the fish image have become quite grey and looks like a shadow ... I quite like the effect!

Now to decide just how I am going to stitch it!  The fish is 24" x 12" so this will take a while to accomplish all the hand work that I am considering for it.

Wednesday, March 9, 2016

Rusted Fish

I have been pondering the idea of creating a rusted fish art quilt for some time and I leapt into it last night after removing everything from my living room fireplace in preparation for painting the brick.

The fish is one that I picked up at a market in Campbell River, BC, some years ago. It has been cut from rusty corrugated iron and it really appeals to me.


What I did was place the rusty fish on a piece of plastic then place the cotton fabric (already dampened with diluted vinegar) loosely on top. I made sure the fabric was making contact with the fish and then covered it with plastic to keep it damp and left it.  I thought it would take a week or two to get the image but today I discovered it was already very rusted  so I am now drying the fabric (while I make another imprint on the other end of the cotton) in preparation for the next step . . . and I'm not yet sure what that will be.  I'll let you know later!

PS ... I hope to remember to stay on-track with the fireplace painting, too!

Saturday, February 6, 2016

Golden Wedding Heart

This is the third piece in my series of silk fusion hearts on felt ... mounted in a 10" square shadow-box frame.

I love the vibrancy of the silk heart that has just a touch of bright green in it ... set against the more antique-gold wool felt background.  I added a row of funky layered embroidery stitches.

Wouldn't this be the greatest gift for a 50th wedding anniversary???

Friday, February 5, 2016

Valentine's Day Hearts

These are the latest of my fibre art explorations . . . A silk fusion heart has been appliqued to a needle felted background and then mounted in a square shadow-box frame.

This piece is a beautifully textured purple heart on a lavender blue background that includes another piece of the raw silk felted into it. I used metallic silver stitching which gives the heart an even more dimensional look.

This second piece has a felted red background with some textured red/orange/purple textured wool yarn felted into it and then a line of purple beads drifting across the surface. I chose purple thread for the decorative stitching to pull in the other bits of purple violet in the felt.

The black shadow-box frames are 30" square with a 4-3/4" opening for the fibre art. There is glass to protect the fibre art from dust.

I am currently working on a third in this series . . . a gold heart that would be wonderful as a 50th wedding anniversary gift.  I hope to finish that one this weekend. The others are already listed in my Etsy shop.


Thursday, January 21, 2016

Fibre Art Quilt ... Grape Leaves on Linen


This is a new art quilt created by painting natural linen with Shiva Paintstiks. I collected grape leaves from vines in my neighbourhood and used them to make stencils that I then arranged across the surface of the fabric.  I used a variety of greens and metallic copper paintstiks to get lots of colour variation in the leaves and then used some of the same colours to create subtle bunches of grapes.

The leaves are heavily stitched with free motion machine stitching and then I outlined the grapes and added tendrils to the vines.  The background quilting has been done in a columnar format, with some of them on an angle, and then the spaces around the leaves and grapes are filled with hand seed stitches.

The piece measures about 20" square and hangs from a sleeve on the back.  The edges are finished with a turned facing for a contemporary look.

This piece is in my Etsy shop now (click on the link on the right side of this screen).


Wednesday, January 6, 2016

Fibre Art Accordion Journal Workshop - March 10 and 17


I will be teaching an Accordion Fibre Art Journal class at Thread and Paper in Salmon Arm on March 10 and 17, 2016 ... Come and enjoy two days of fibre art fun, creating samples that will be incorporated in this beautiful journal.

Techniques we will explore include creating a piece of unique fabric, fibre art beads, covered sticks and pipe cleaners, organza leaves, thread lace images, stamping fabric, beading and a variety of edge finishes.

To register call Thread and Paper at 250-832-3937 or drop by this Saturday (10am to noonish) to speak to me and to see the sample of the accordion journal.

Fibre art experience is not required, although you will want to be familiar with your sewing machine and be willing to play with fibre!

Monday, November 16, 2015

Talk and Trunk Show at South Shuswap Library

Thursday, November 19th - 2:30-3:30

at the South Shuswap Library

Blind Bay, BC


I will be doing a short talk about fibre art and my inspirations and techniques I use in my work. There will also be a "trunk show" of some of my art quilts and other fibre art work shown at this time.

Hope you will come and join us!


Wednesday, November 11, 2015

Artistry 2015 - In Blind Bay this weekend

I will be at Artistry this weekend with my purses, cuffs, small art quilts and my all-new eco printed purses, cuffs, scarves and tablerunners.  Hope you will find time to drop around on Saturday 10-4pm and on Sunday 11-3pm.

Sunday, October 25, 2015

Eco print purses are ready!

Wow, it is a whole month since I posted here and I have been busy creating purses and scarves from my eco printed fabric.

This weekend I bundled up some more fabric with fall leaves and they are now curing for the next four or five days ... it is SO hard to wait that long to unroll the bundles and see what prints have appeared.  This time I used one pot to which I added just a little cutch and some pomegranate tea (the fabric looks warm brown on the outside of the bundles) and a second pot to which I added some logwood and osage along with rusty iron spikes (they look bluer on the outside of the bundles). 
Here are the bundles after they were taken from the pots and they are draining and curing in this mesh basket. The two darker bundles are scarves that I have over-printed to get some more distinct prints in the middle of them ... they were quite dark already so I am interested to see how they turn out this time ... maybe I shouldn't have added more iron, but I'm being adventuresome!

I have been working on a new design for purses using this eco printed fabric. They are a little larger than my usual little fold-over purses and they also have a sturdy zipper along the top.  I listed the first one in my Etsy shop today and will list more during the coming week.
I am also working on some of my "usual" design purses (one of them was listed in my shop today) as I know that some people just love that design.

Please drop by my Etsy shop to see more photos kathykinsella.etsy.com

What do you think of them????